Paneling up


 Today I fitted some of the ali panels to the Mojo.
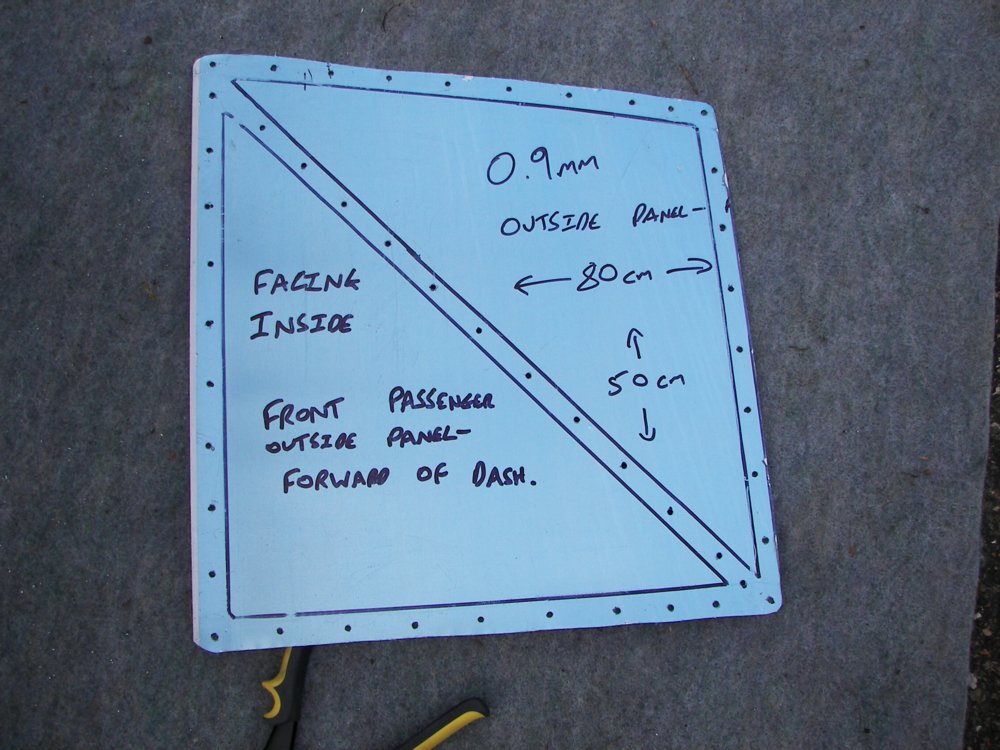
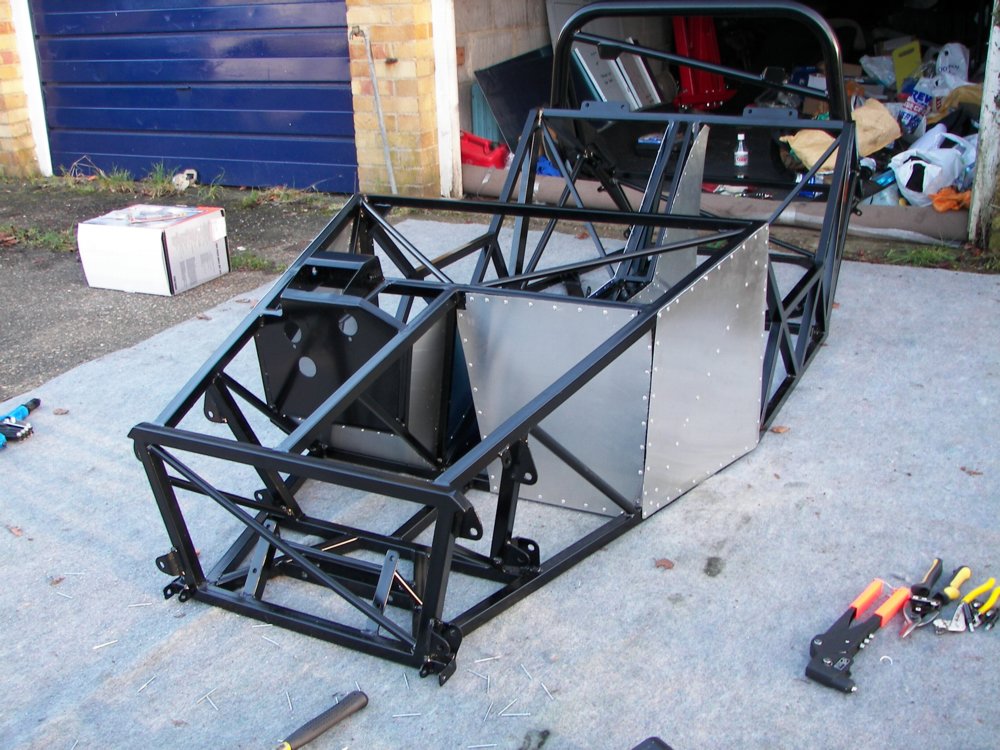
The top picture shows where I have marked the chassis onto the panel, then drilled through it. This panel was then deburred, placed back up to the chassis, and I drilled through the existing holes into the chassis – a scary moment! The second photo shows the chassis with the holes drilled in it.
The panel then had its protective film removed, and was bonded using a polyurethane sealant and riveted into place.
The easiest way of doing this was to put out some carpet down to protect the chassis, then turn it onto its side.
It was a good day all in all as I have now fitted the driver and passenger forward outer panels, the passenger foot well end panel and the two smaller panels that go under and to the left of the driver foot well area.
I have also drilled all the holes into the chassis to take the two tunnel side panels, but have not fitted them yet, as access is needed into the tunnel to fit brake lines, fuel pipes, water pipes……
The next job is to drill through the seat back panels into the chassis to mark out all the mounting holes. They will also not be fitted yet, as this makes access to installing the engine easier. Then I can fit the floor pan, a mini milestone!
posted by Trevor Bennett @ 6:45 PM
![]()


<< Home